Wood carving craft for the choice of materials is relatively strict. Therefore, only by choosing the right materials can lay the foundation for complex operations. There is a difference between softwood and hardwood. Generally speaking, softwood is easier to carve, while hardwood is relatively difficult to carve.
Hardwood is characterized by tough wood, fine grain, and bright colors, such as mahogany, boxwood, and so on. They are superior materials for carving and are suitable for carving works with complex structures and fine modeling.
At the same time, because of its own hardness, it is not easy to break damaged in the carving process and has a high collection value. However, also because of its hardness, the carving process is more laborious and easy to damage the knife.
For beginners, using softwoods such as ginkgo wood, camphor wood, and pine wood is a good choice. This type of wood is suitable for works with a single structure and simple shapes, and it is easier to carve.
However, because of their soft wood and weak color, some of them need coloring treatment to strengthen the sense of volume. Of course, the design pattern should be highly generalized, as overly complex and overly detailed patterns will not only destroy the wood grain but also create visual contrasts.
So before creating a piece of work, it is necessary to know something about wood and choose the right material.
Table of Contents
Drying treatment of wood
1. Artificial drying
The wood will be sealed in the steam drying room, with the help of steam to promote the evaporation of water, so that the wood dries. The highest degree of drying can make the wood moisture content of only 3%, but this will make the wood lose toughness. This is not favorable for carving. Generally speaking, the degree of drying should be maintained at about 30% of its moisture content.
2. Natural drying
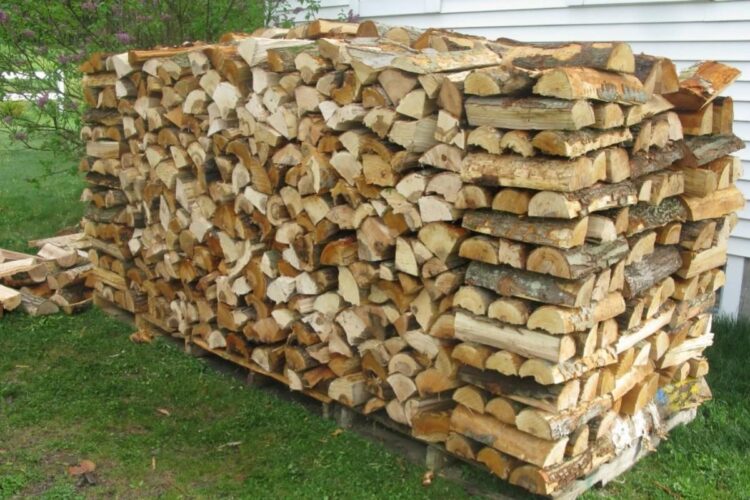
Sort the wood and place it outdoors in a ventilated place, stacking them into firewood stacks. Take care to leave a gap in the middle of each log so that air can circulate continuously to take away the moisture. Natural drying generally takes years or months to achieve certain drying requirements.
3. Simple artificial drying
Hey! This is a common method. It has two simple methods. The first is to use a small fire to dry the internal moisture of the wood. The second is to use boiling water to slowly soak and wash away the resin content in the wood and then put it in the air to dry or dry. Drying time may be shorter with both methods. Unfortunately, however, such wood tends to darken and damage the wood to some extent.
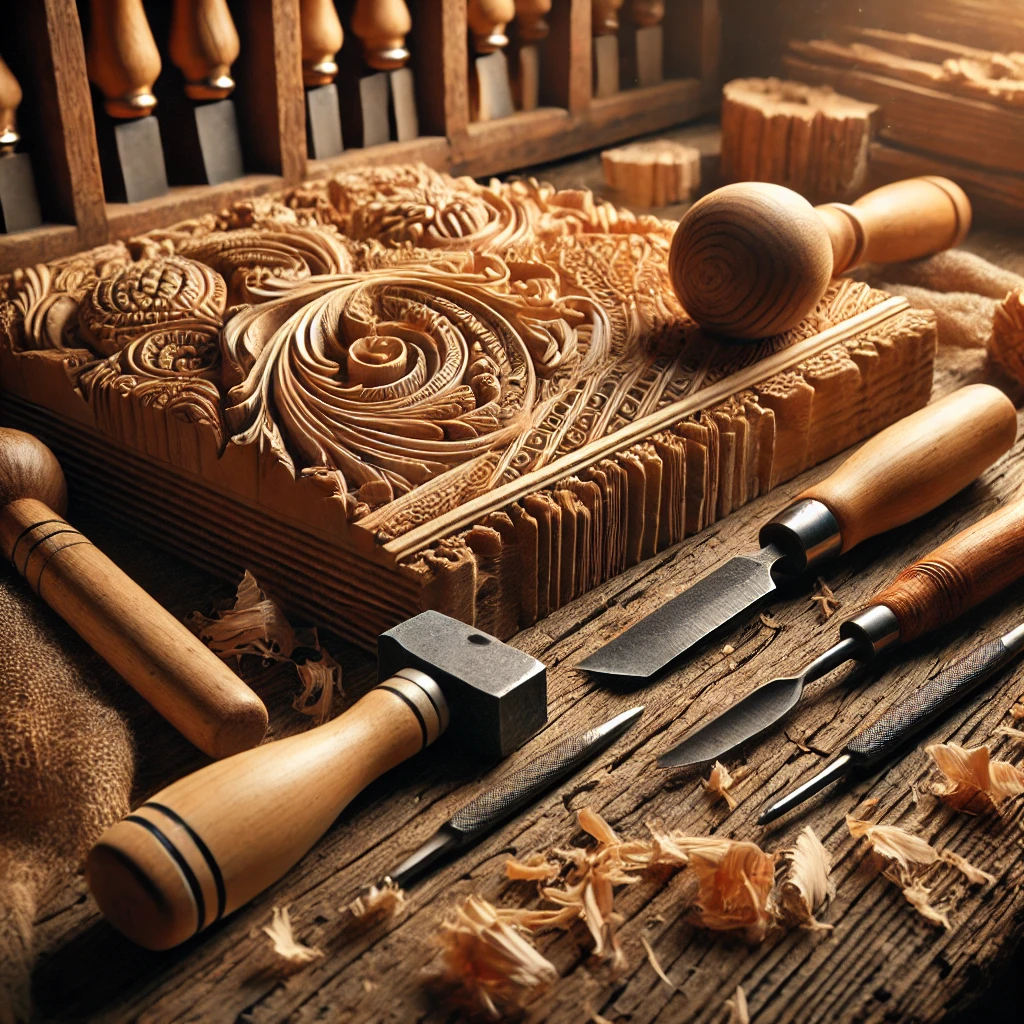
Engraving techniques
The so-called technique is the wood carving creation of the author of the image and space handling techniques. Beginners can follow the following process::
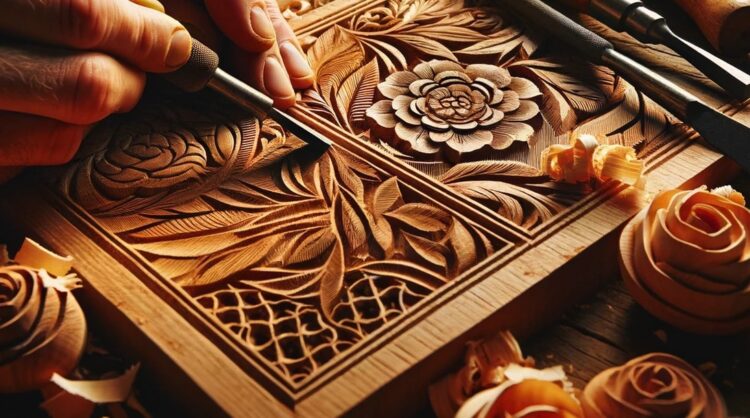
A first and most important step is to draw the design and then sketch it on the wood with ink lines. Hey, please choose a favorite pattern to design. If get stuck in this step, please ask for the internet to find the inspiration. This step will give a rough prototype of the piece.
The rough embryo is the foundation of the whole piece. It encapsulates the overall structural shape in simple geometric shapes. Carving the rough embryo can be done from top to bottom, from front to back, from the surface to the inside, and from shallow to deep. For beginners, please start with the whole first, adjusting the proportions and various layouts appropriately. At this stage, the volume and lines of the work have become clear, so the knife is required to be rounded and smooth, to have full expressive power.
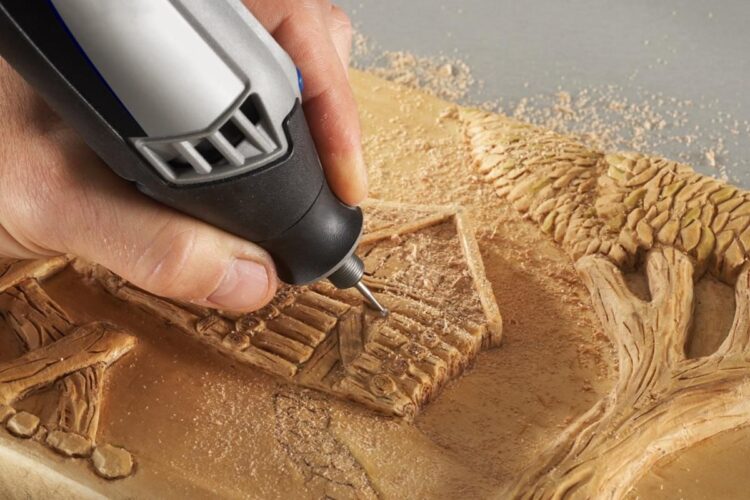
Sleeking ─ Use the pneumatic engraver to scrape the surface of the rough embryo wood carving, so that the overall lines of the wood carving are more fluent, and that the surface of the work is detailed and perfect. Try to show the details and connotations of the work as accurately as possible.
Polishing ─ According to the needs of the work, the wood carving with different thicknesses of woodworking sandpaper rubbing. Use coarse sandpaper first, and then use fine sandpaper. To follow the direction of the wood fibre sanding, until the desired effect.
Coloring ─ Coloring pigments generally refer to water-soluble ones, such as gouache and watercolor. They are characterized by small coverage and strong penetration. Acrylic paints for oil painting should not be used. Do not mix the colors too thickly, and ensure that mix pigment and water in a ratio of 30:1. If the colors are mixed properly, it is time to apply the colors. This is a process that beginners will have to repeat over and over again. Coloring is not only to make up for certain wood deficiencies or defects but also to play a role in enriching the beauty of the texture of the material and the beauty of the form of the work. Therefore, beginners should achieve a balance in the color of the work, that is, reflect the content of the work while retaining the beauty of the wood itself.
Always leave the wood carving to air dry by the window after coloring. Please wait until it is air-dried and then use a clean cloth to wipe the surface of the work until it produces an even luster. In some cases, it is acceptable to wipe the paint from a particular detail of the piece so that the underlying color of the wood is exposed.
This method enriches the colors of the piece and also enhances the layering of the piece.
When the carving of a piece is completed, it is a relief from the stress of this process. Looking at this craft is like looking at a newborn baby. There is always a sense of success and pride, which may be the charm of creation.
However, to really feel its infinite charm, it is imperative to engrave more and practice more. This is the only way to develop a unique artistic language and style.